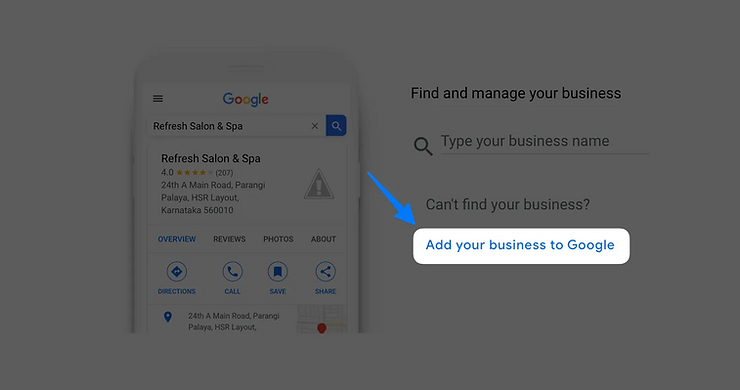
If it’s listed, select it to proceed to verification (go to Step 11).
If it’s not listed, click Add your business to Google and continue with Step 3.
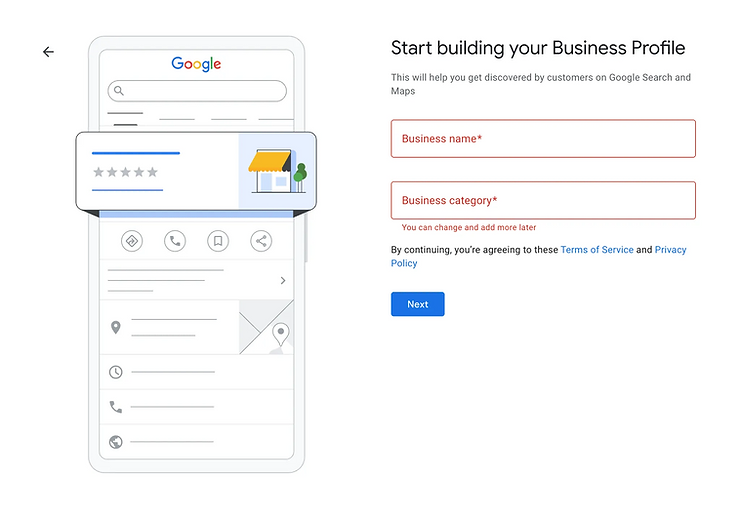
Step 3: Provide Accurate Business Data
Accuracy is critical: All information you enter must be exact as Google will later verify it.
Business Name: Enter your business name exactly as it appears in real life (matching signage, documents, etc.).
Business Category: Choose your business category from the suggested list provided by Google. If the category isn’t immediately visible, type a keyword to display the options and select the best match.
Then click Next.
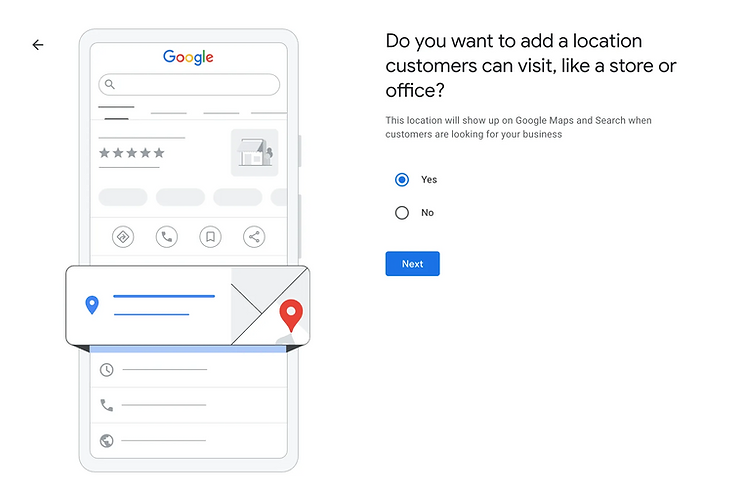
Step 4: Indicate a Physical Location
Location Type: Select Yes if customers can visit you in person (store, office).
Service Area: Select No if you don’t have a walk-in location, and you’ll be prompted to set a service area instead.
Click Next.
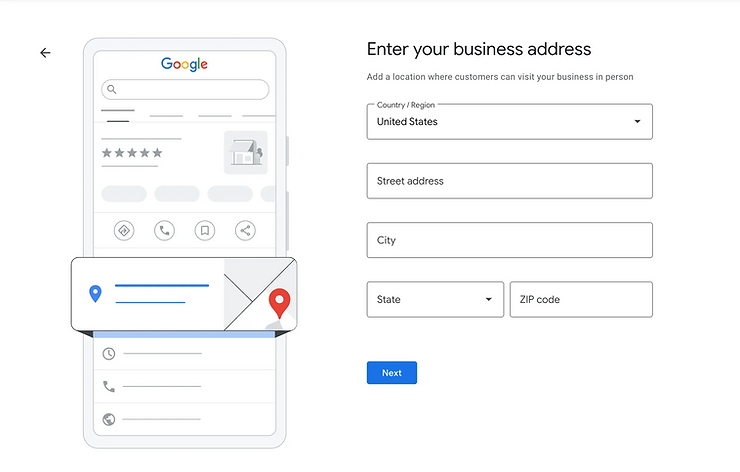
Step 5: Enter Your Business Address
Accurate Location: Provide your street address, city, state, and ZIP code exactly as it appears for in-person visits.
No P.O. Boxes: Use a physical address, not a P.O. box or virtual office.
Click Next.
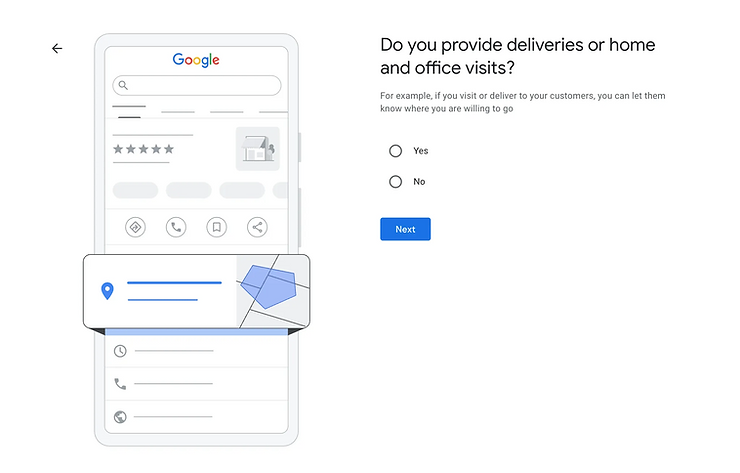
Step 6: Services or Deliveries
Select Yes if you deliver products or visit customers at their location.
Select No if customers only come to your physical address.
Click Next.
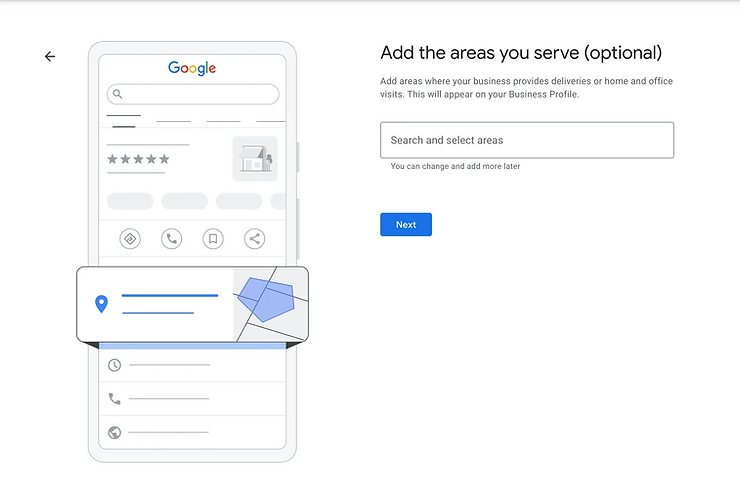
Step 7: Add the Areas You Serve
Optional: If you deliver or visit customers, enter specific cities, regions, or ZIP codes.
You can add multiple areas and update them later.
Click Next.
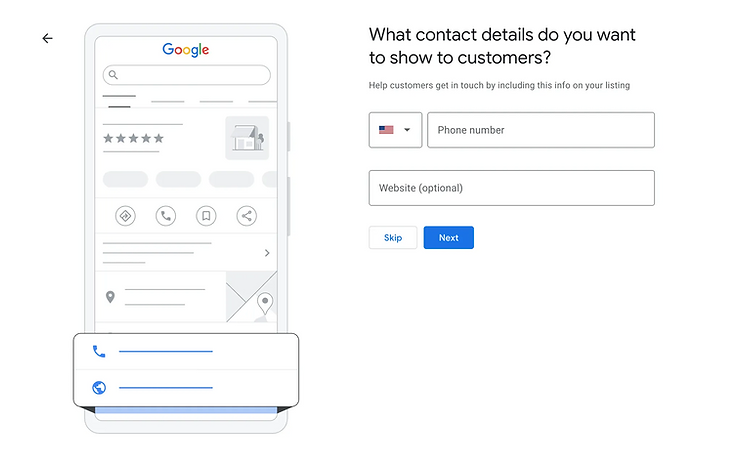
Step 8: Contact Details
Phone Number: Provide your primary business phone number (mobile or landline).
Website (Optional): Enter your website URL if you have one.
Click Next.
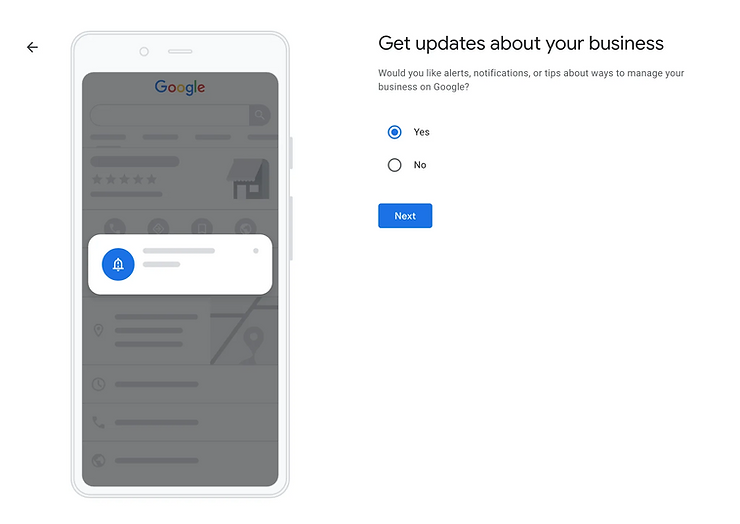
Step 9: Choose Business Updates
Recommendation: Select Yes to receive notifications and tips from Google about managing your profile.
Then click Next.
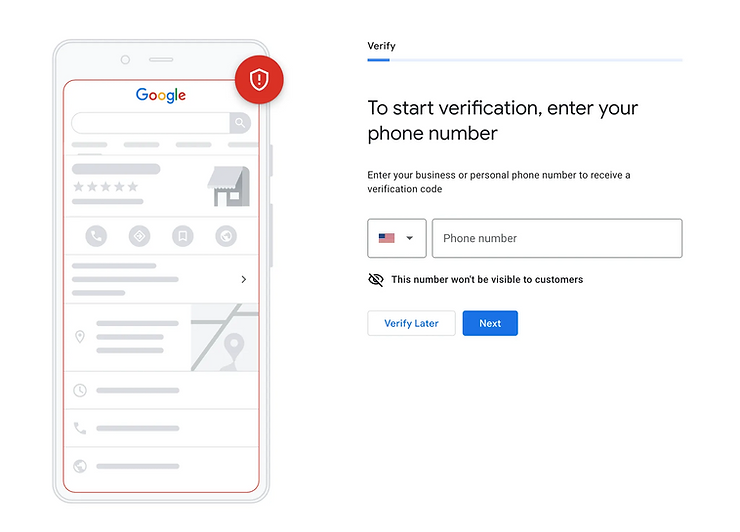
Step 10: Phone Verification
Enter your phone number to receive an SMS code (this number remains private).
Receive and enter the SMS code: Google will send you a verification code. Once entered, the process will continue with further verification steps.
Step 11: Additional Verification Options
Phone verification is often not sufficient: In many cases, verifying by phone alone doesn't fully confirm your profile. Additional verification is required to ensure the authenticity of your business details.
Additional Methods Include:
Postcard Verification: Google may send a postcard with a unique code to your business address. Once received (usually within 5–7 days), enter the code to verify your address.Email Verification: Some businesses can verify via a link sent to their official business email address.Video Verification: You might be asked to record a short video (or join a live call) showing your storefront, interior, signage, or equipment to prove your business's physical presence.Instant Verification: If your website is already verified in Google Search Console, you may qualify for instant verification.
Follow On-Screen Instructions: Complete any additional steps as prompted to finalize the verification process.
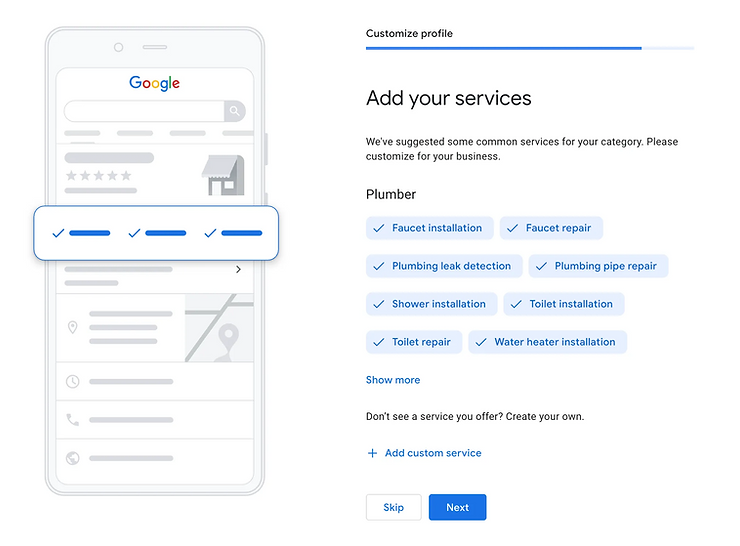
Step 12: Add Your Services
Suggested Services: Google shows a list based on your chosen category.
Choose 2–3 Services or Skip: Pick a few that match your offerings, or click Skip if you prefer to add them later.
Click Next.
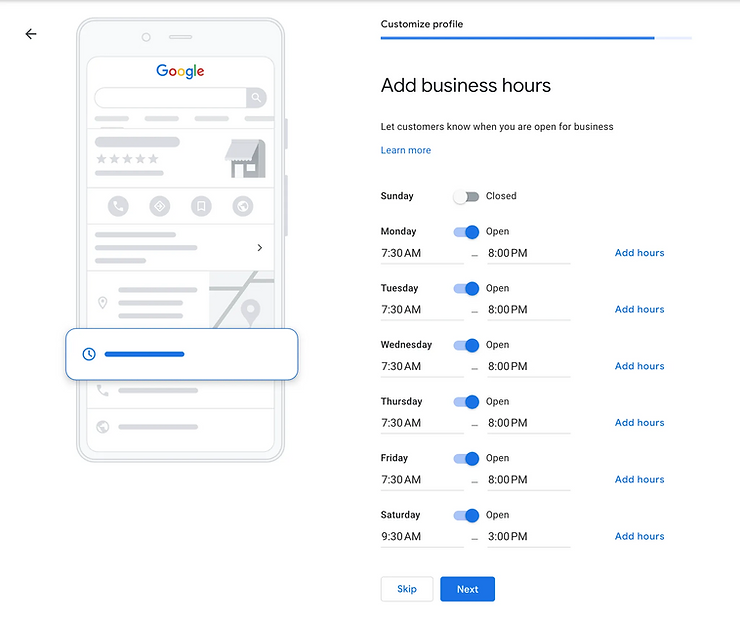
Step 13: Add Business Hours
Select Days & Times: Indicate which days you’re open and set opening/closing times.
Adjust Hours: Use Add hours for different schedules (e.g., lunch breaks).
Skip or Next: Click Skip to do this later, or Next to continue.
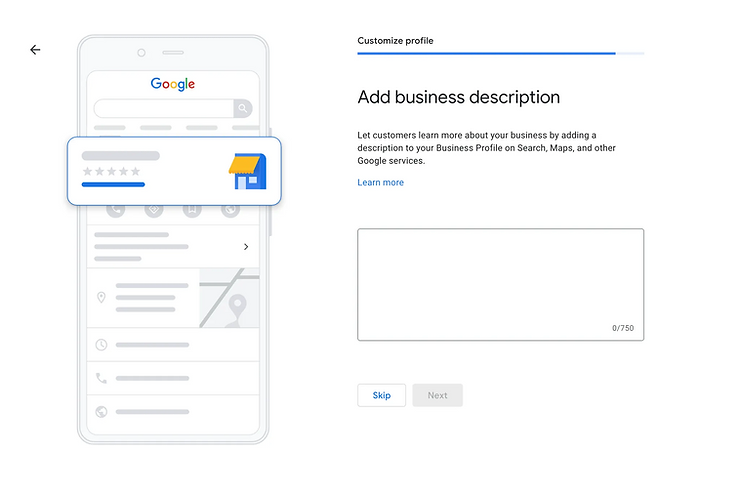
Step 14: Business Description
You can add a short summary (up to 750 characters) about your business, or skip it now.
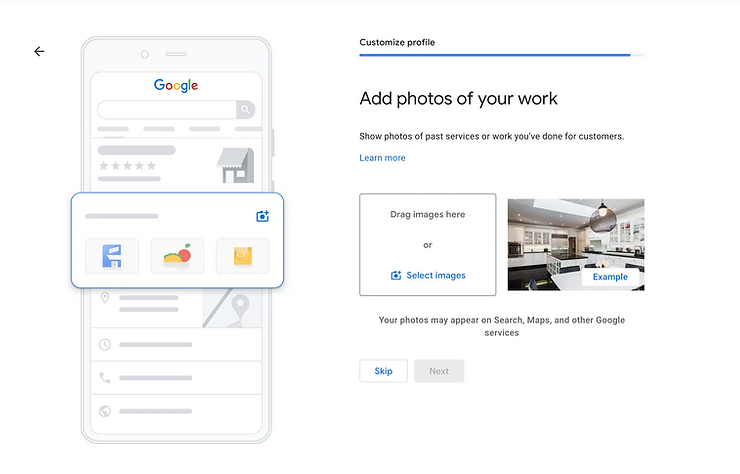
Step 15: Add Photos (Optional)
Upload Images: Drag and drop or select images showing your location, products, or services.
Visual Appeal: Adding photos helps customers see what you offer and can improve your profile’s engagement.
Skip or Next: If you’re not ready, click Skip; otherwise, click Next to finish setup.


.png)